Playfield Wiring for PinKit Controllers
This section describes the steps in laying out the wiring to connect the playfield elements (Coils, Switches, and Lamps) to the PinKit controller boards.
Step 1 - Count the Elements
The first step in wiring the playfield is to count the number of coils, switches, and lamps. Each PinKit controller board drives four coils, and up to twelve switches and lamps.
For this playfield, there are 47 lamps, 27 of which are general illumination (GI) lamps and 20 are controlled lamps. There are 38 switches and 7 coils. Note that this playfield, being an older EM, has an unusually small number of coils. Lamps and switches can be grouped as a trade-off between cost and features. For example, GI lamps that are close can be paired with only a very small loss of effect during attract mode. Switches that score the same value can be pairs with only a small loss of diagnostic isolation.
It takes a bit of trial-and-error to converge on the optimal number of controller boards. For this playfield, slingshot and some peripheral switches were grouped to get the switch count down to 32. Configuring the boards for 8 switches and 4 lamps results in a board count of FOUR, covering up to 16 coils, 32 switches, and 16 lamps. A 32-lamp matrix board will be used to drive the remaining lamps.
Step 2 - Label the Elements
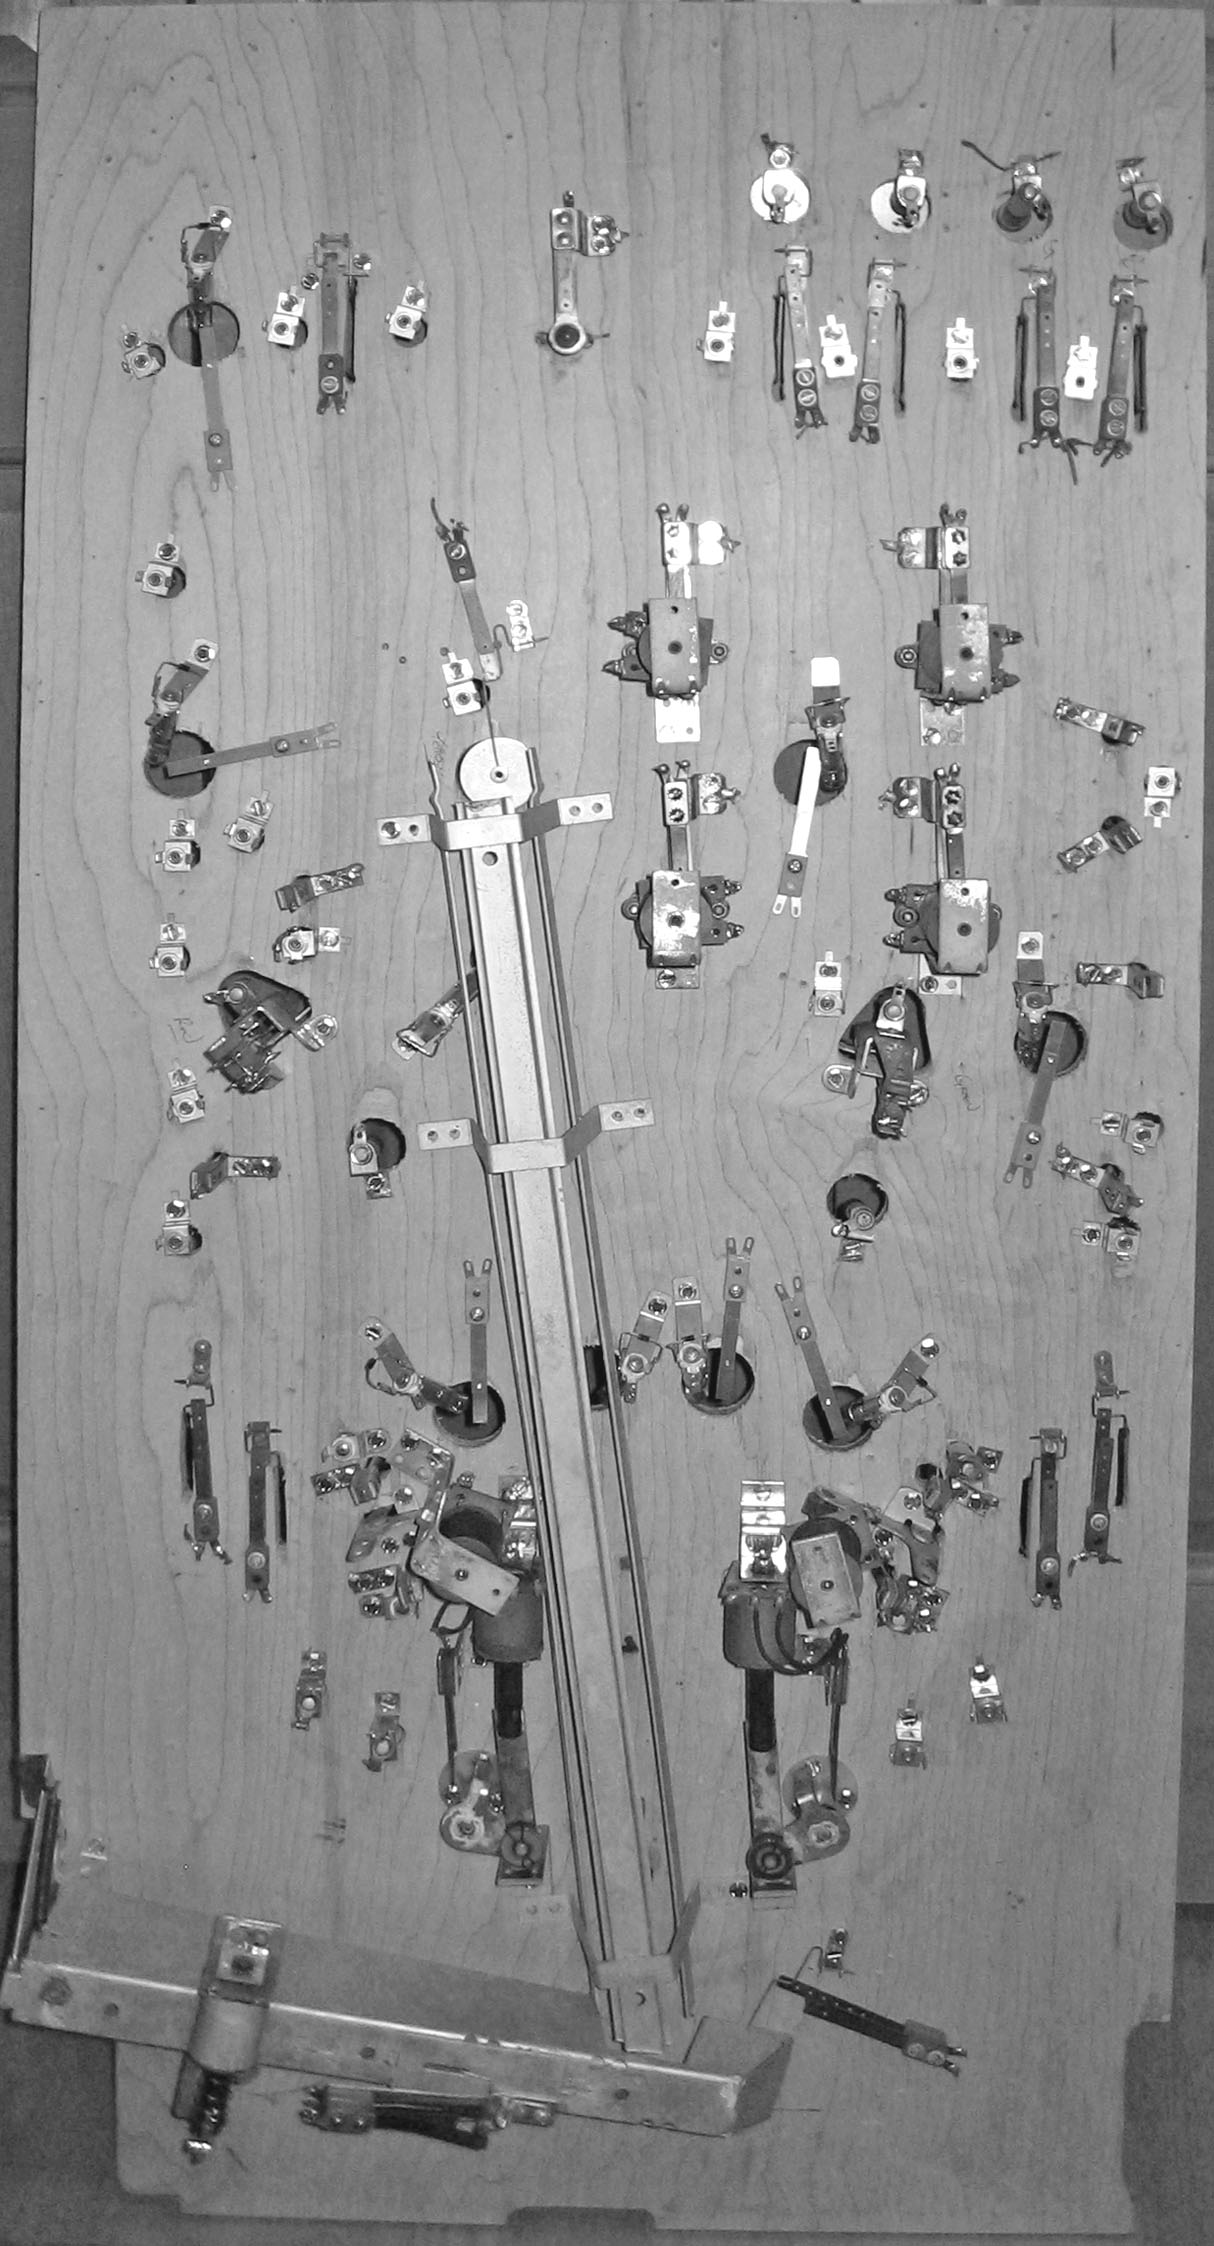
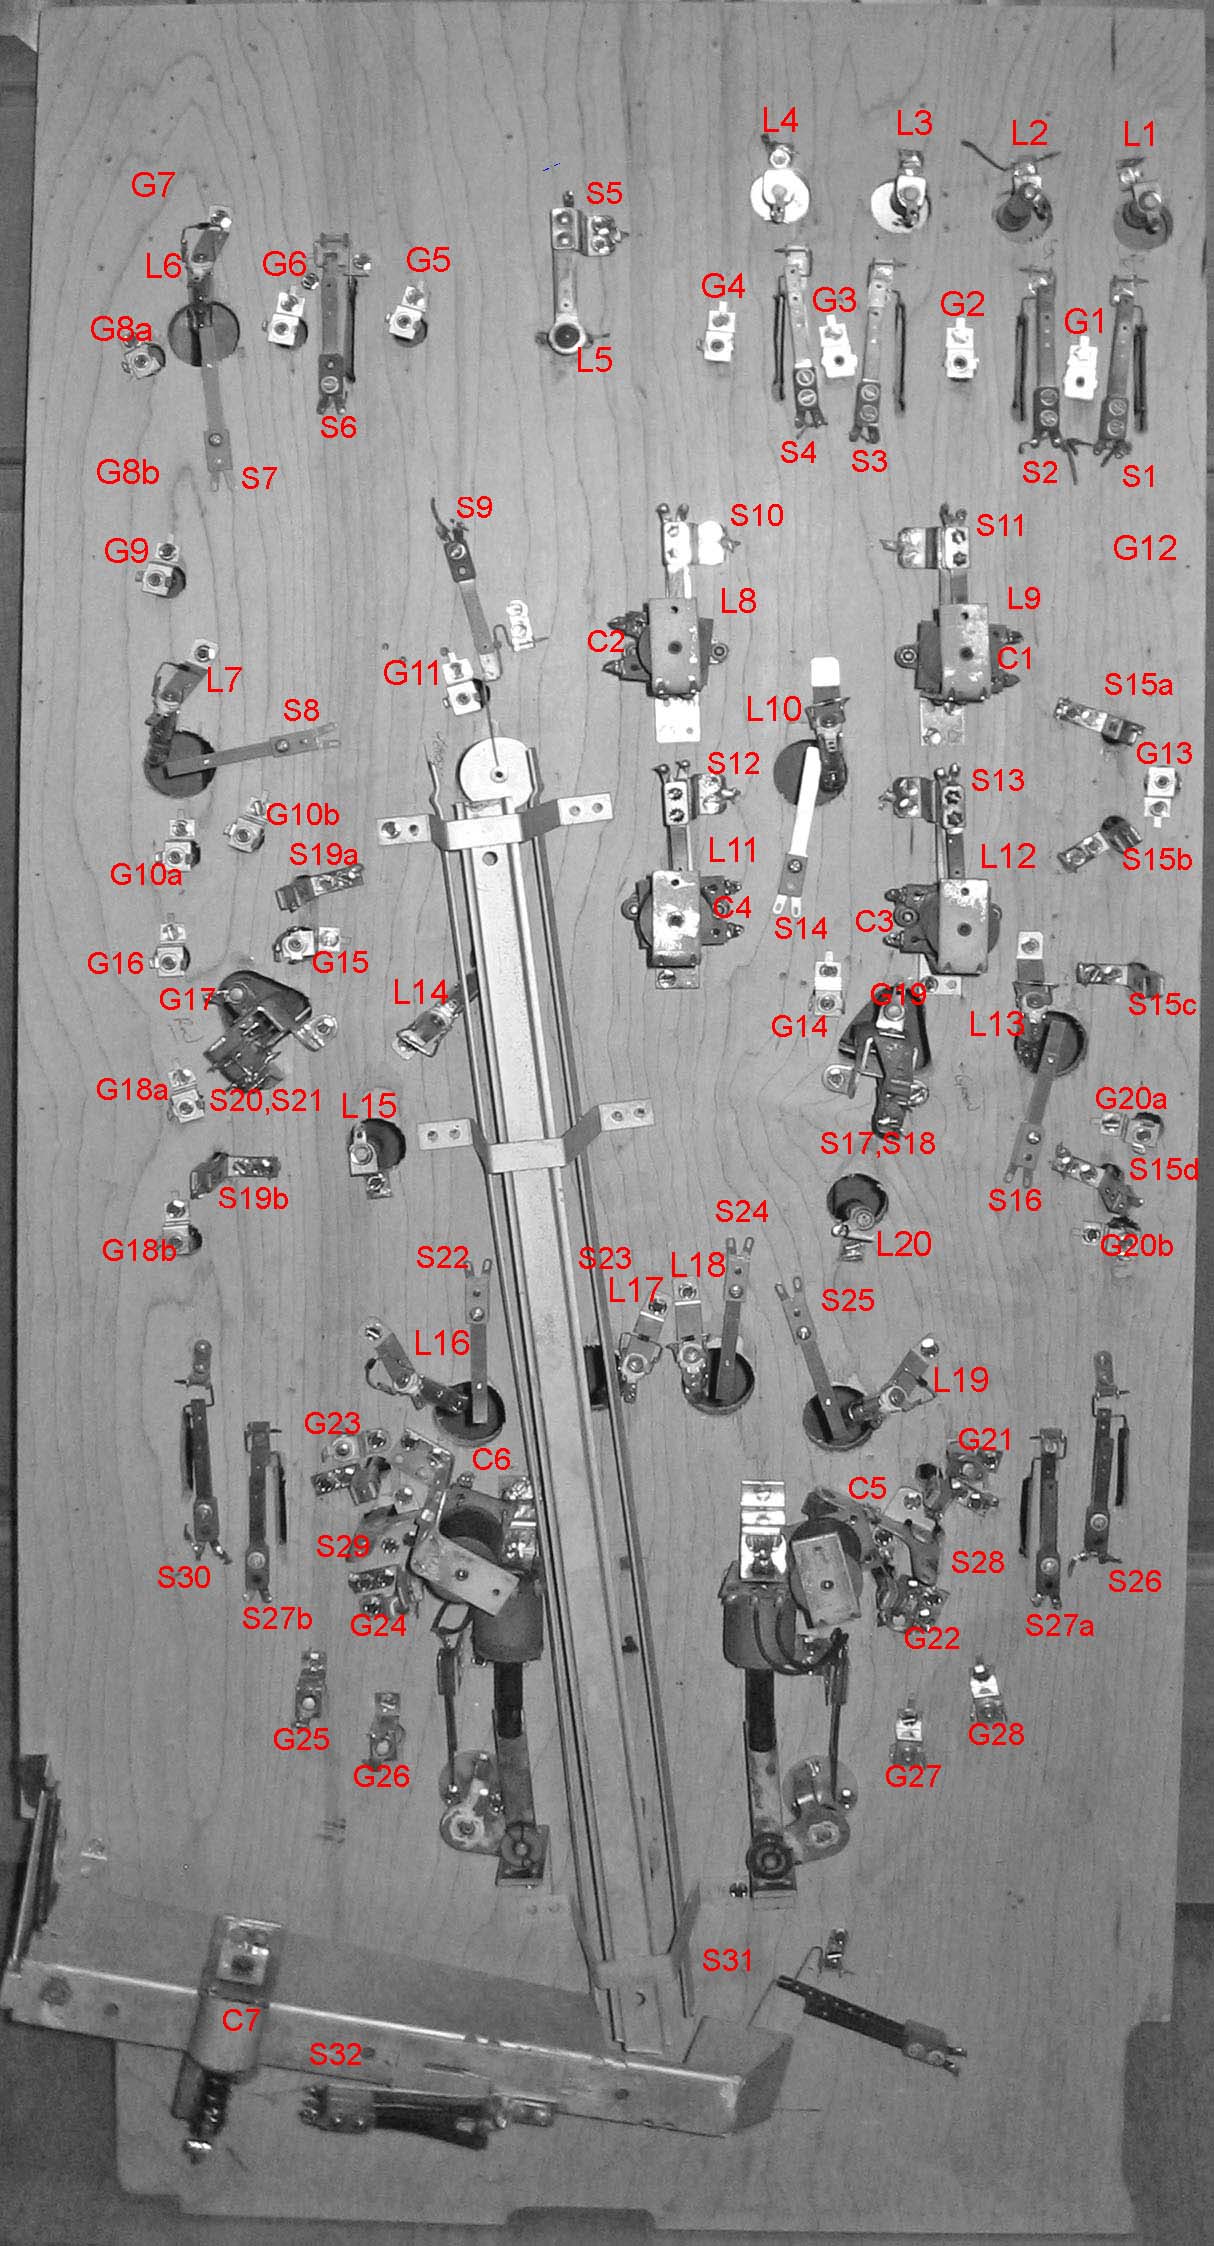
After experimenting with a couple prototype playfields I've settled on a numbering convention that works well. Using the picture of the underside of the playfield, start at the top right-hand corner and work to the left in a back-and-forth "S" pattern. This makes the numbers easier to find when looking from the top and tends to keep consecutive numbered elements on the same controller. That said, there's no functional reason for numbering the elements in any given way.
The following picture shows the underside of the playfield with lamps (L), GI (G), switches (S), and coils (C) labeled.
Step 3 - Group the Elements
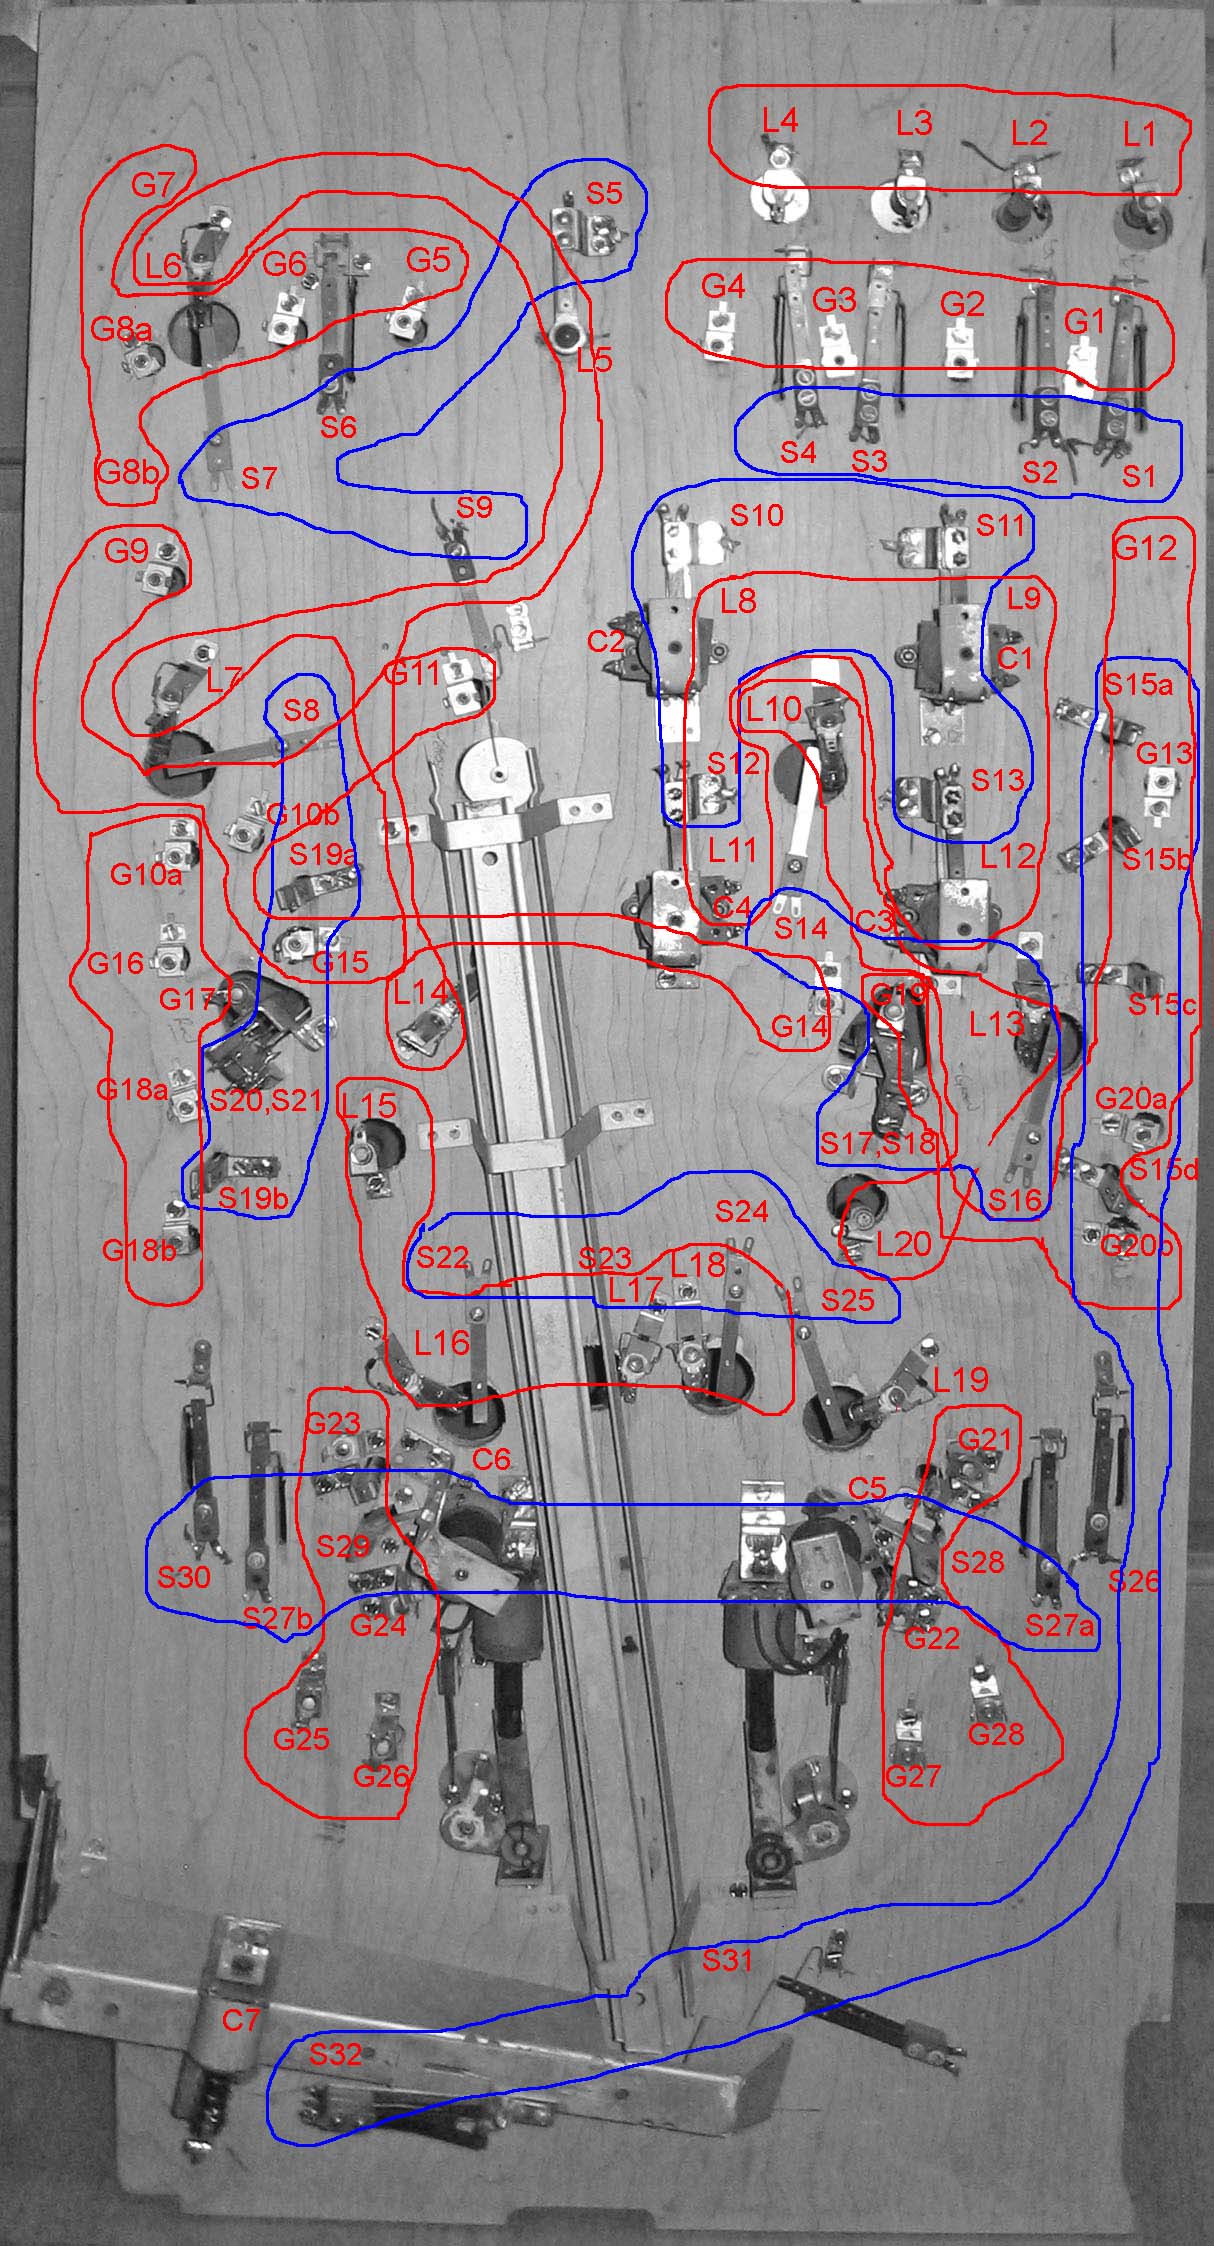
This is where the work starts. Once again there is some trial-and-error involved to get to the best solution. The goal is to group coils, switches, and lamps into local groups that will connect to a controller. Keeping the groups as tight as possible minimizes the amount of wire needed to connect to the controller. In the case of this playfield and number of controllers, groups of four are required. On some other playfields, groups of six may be needed.
One thing to note with the grouping show here is that the controlled lamps and GI were not mixed in a group. Usually this isn't required, but for this playfield we may want to modify the lamp matrix controller to support incandescent lamps for the GI.
The following picture shows the underside of the playfield with lamps grouped in red and switches grouped in blue.
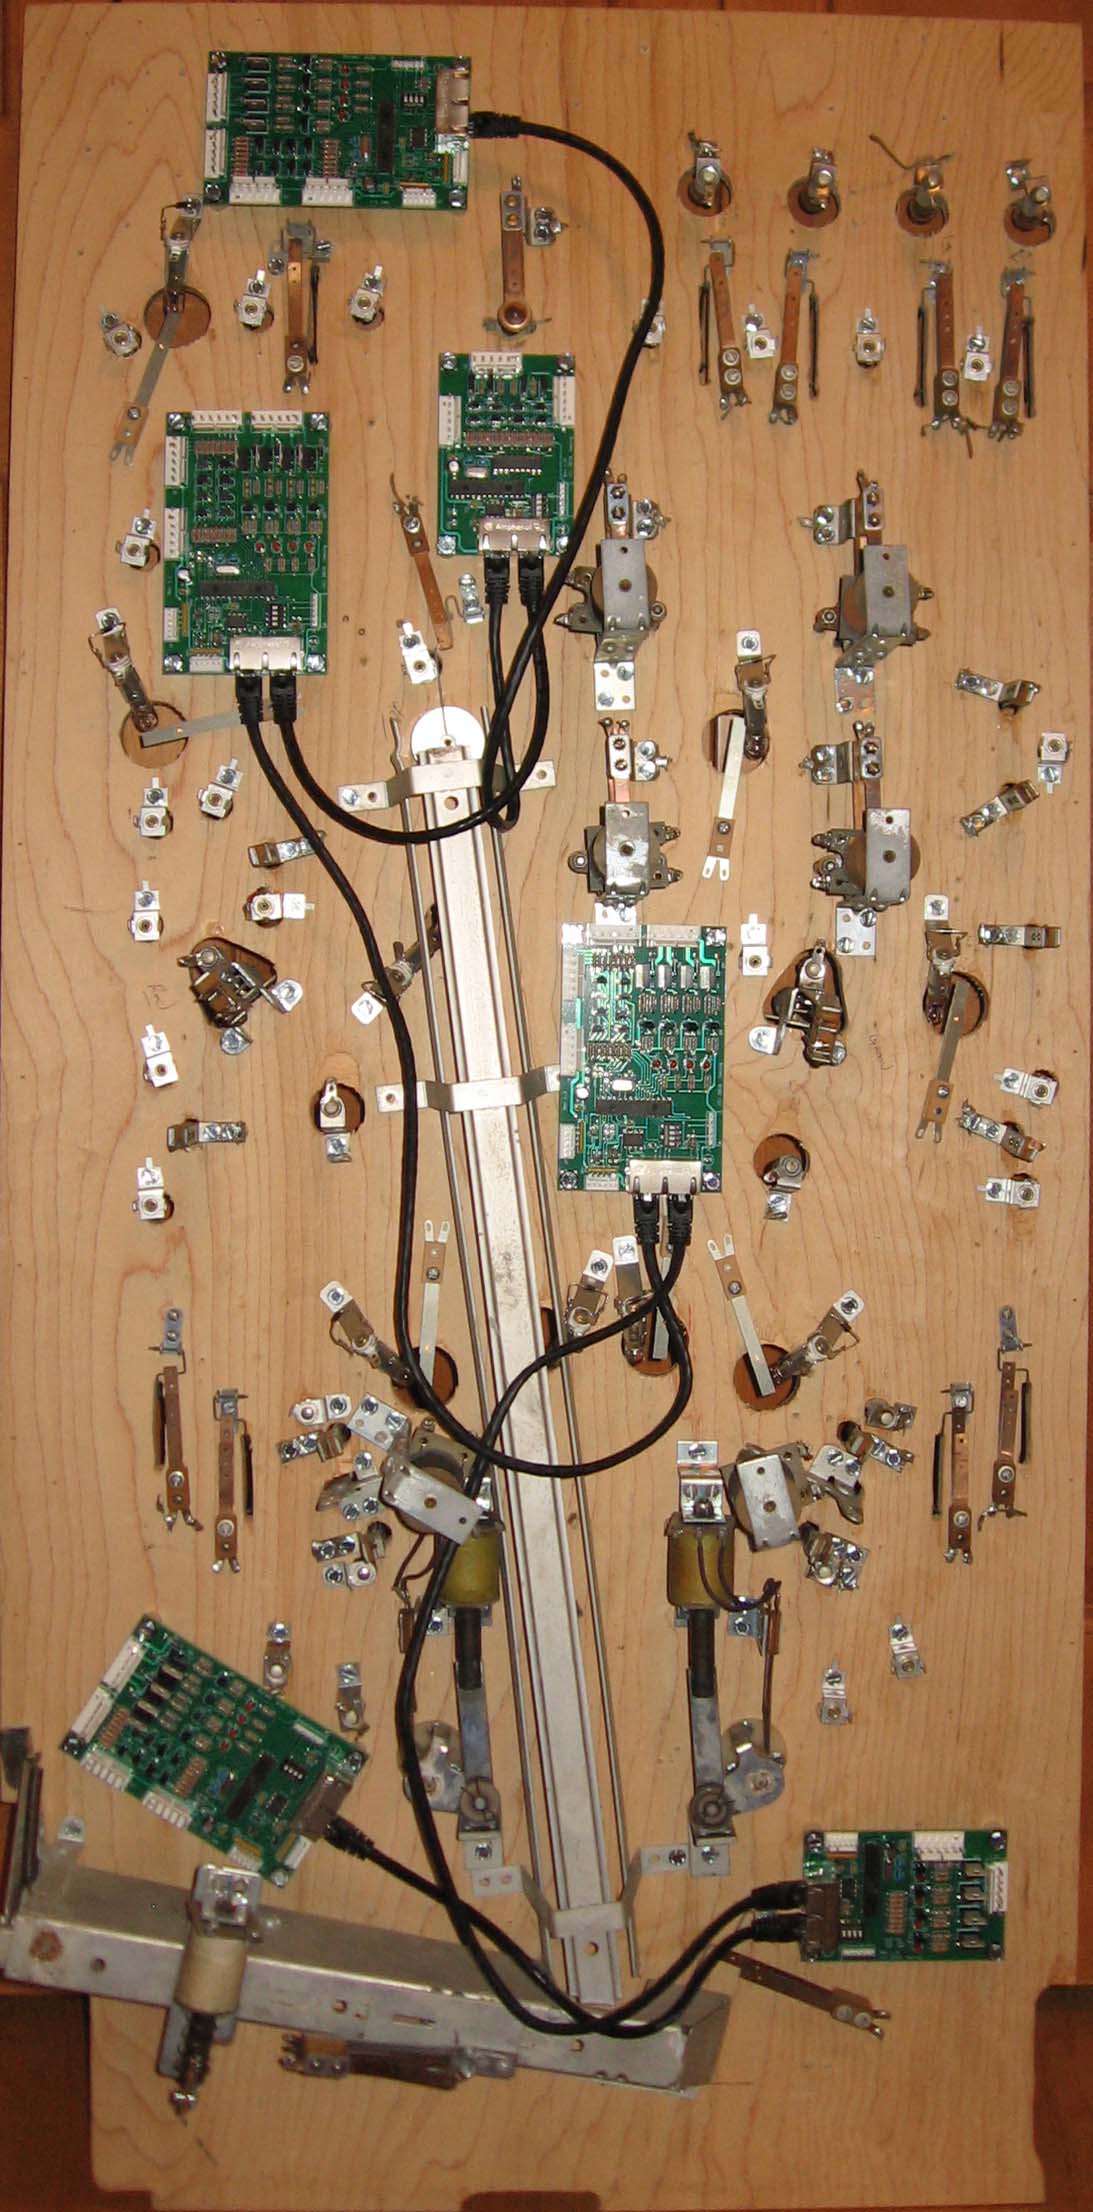
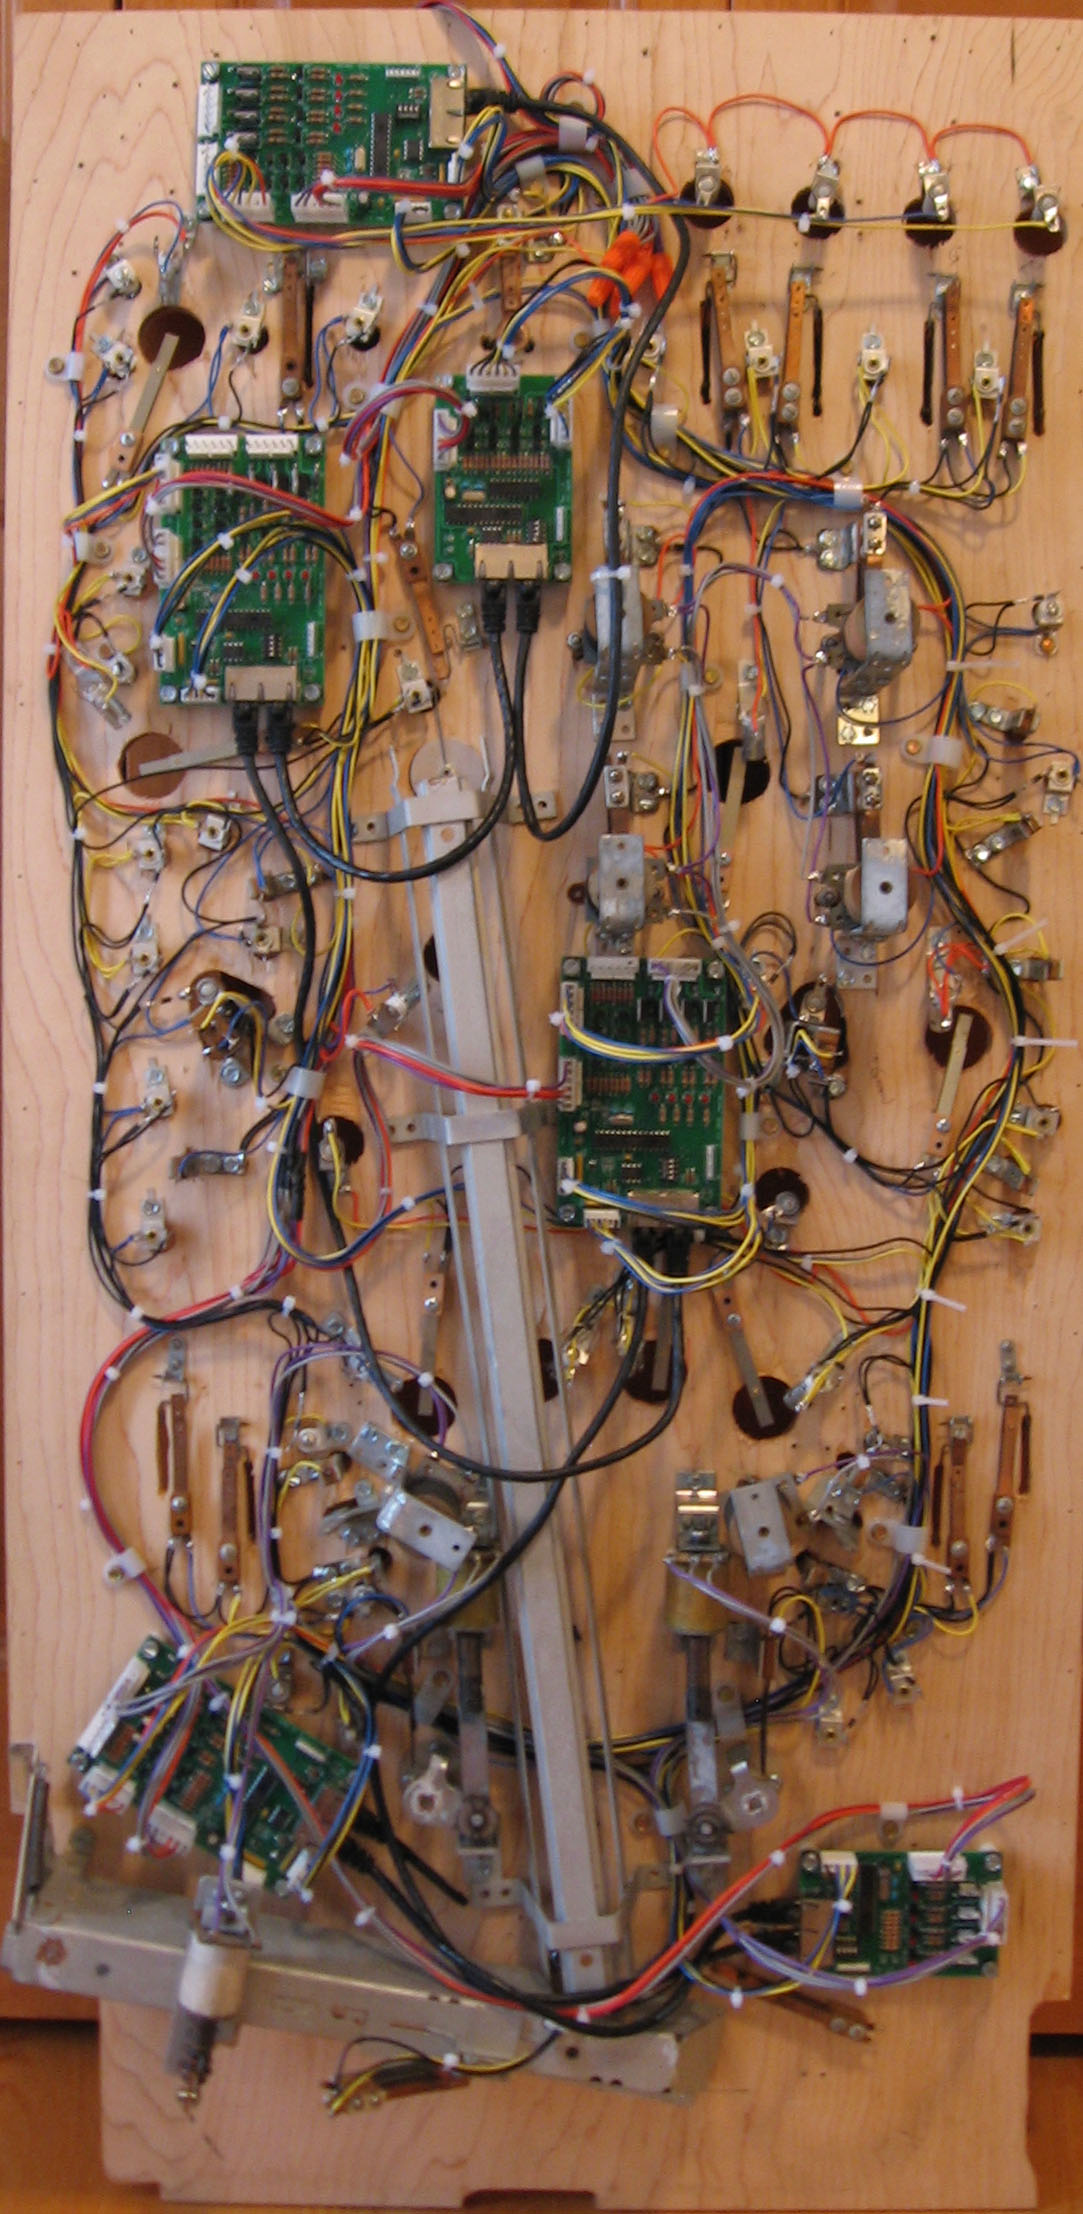
Step 4 - Position and Attach the Controller Boards
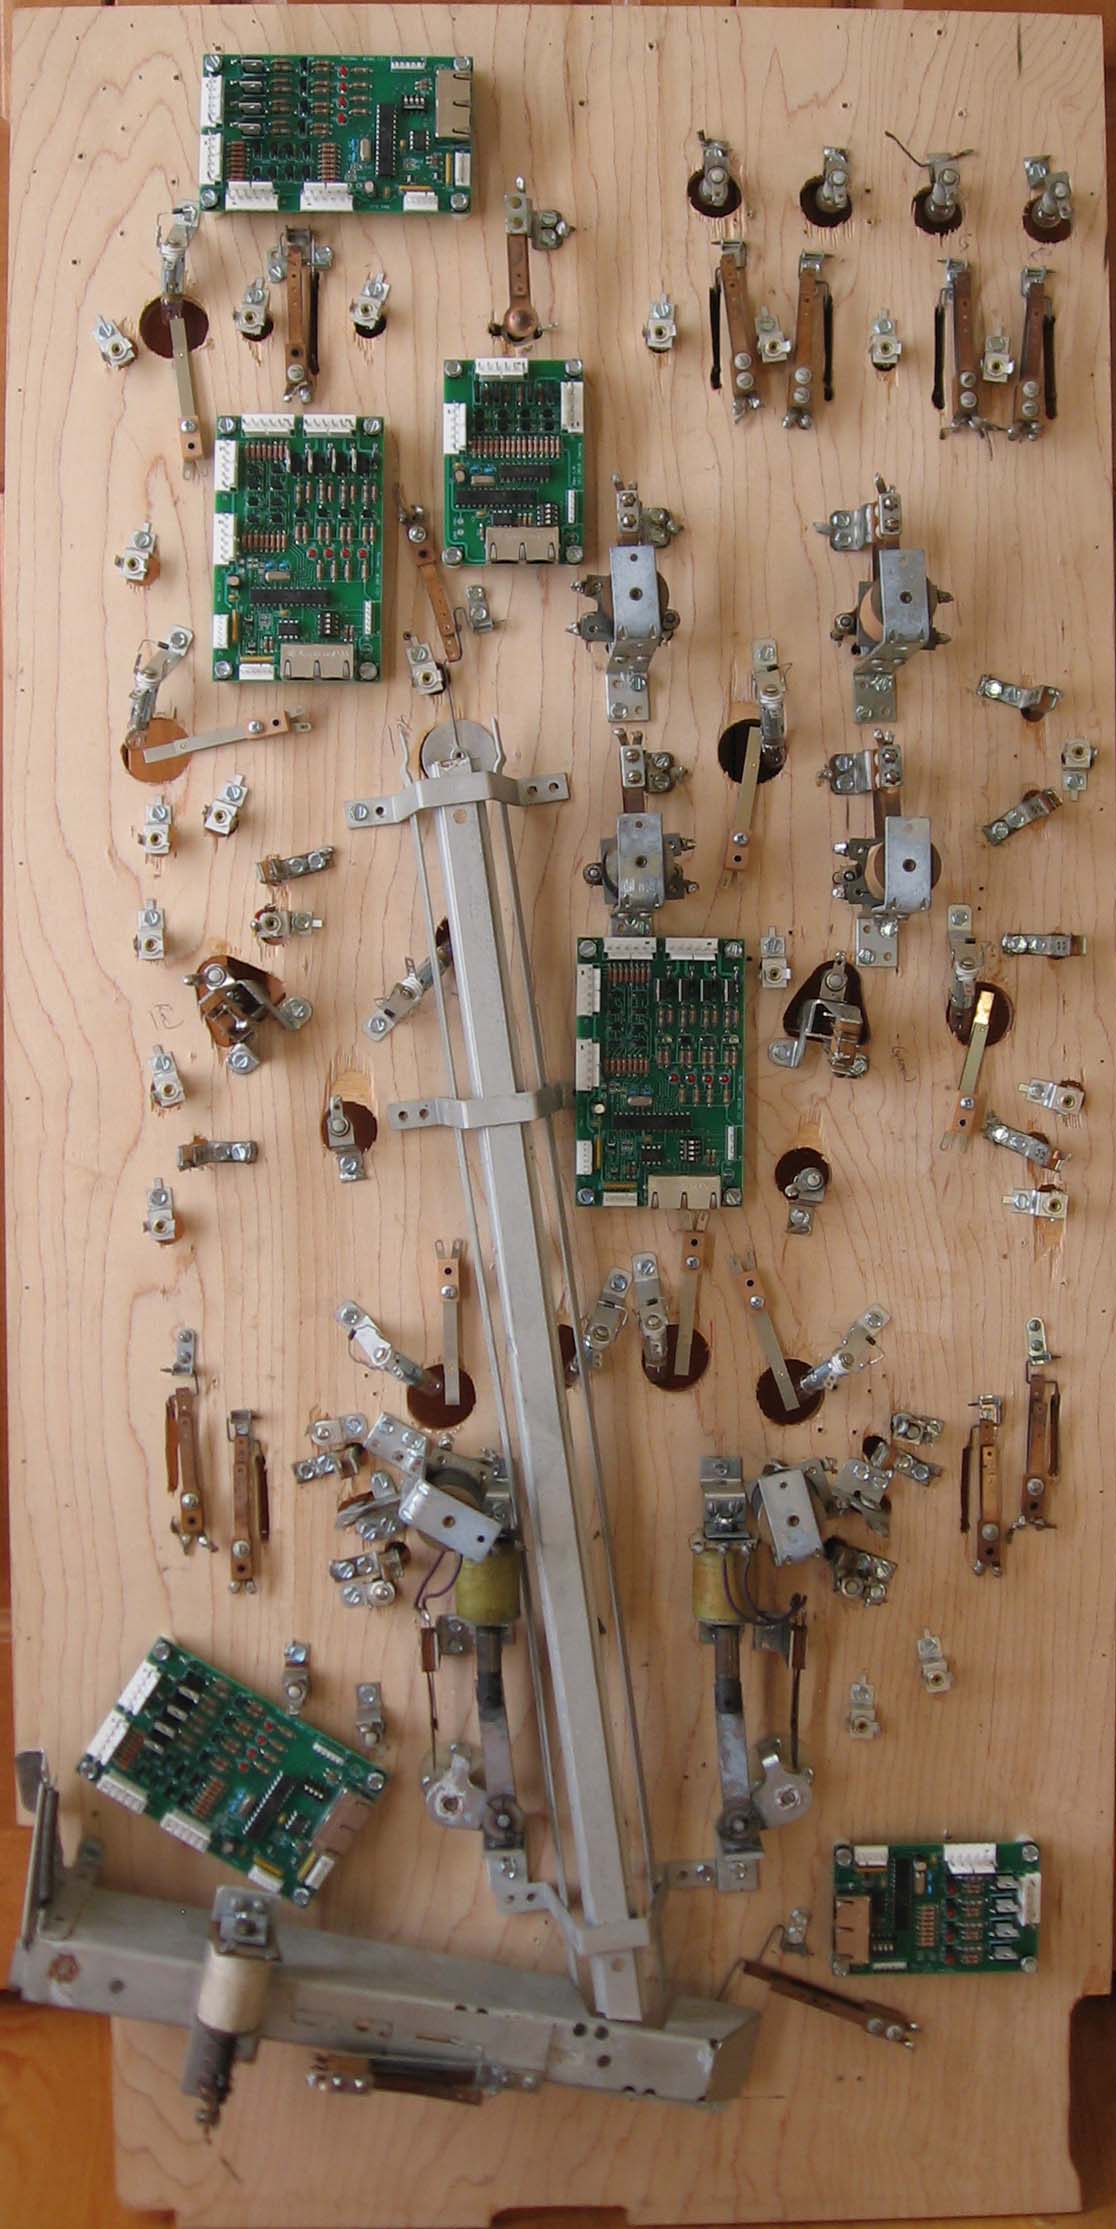
Step 5 - Wire the PinCAN bus cables
It's important to make sure there is room to plug and unplug the CAT-5 cables. The order in which boards are connected does not matter, they only need to be daisy-chained together. For the early wiring the goal is to get everything connected and leave slack to wire-tie things in place later.
Note that the hardware for the rollover switches at the top left was moved slightly so the controller board could be moved over to make a wiring channel to the right of the board.
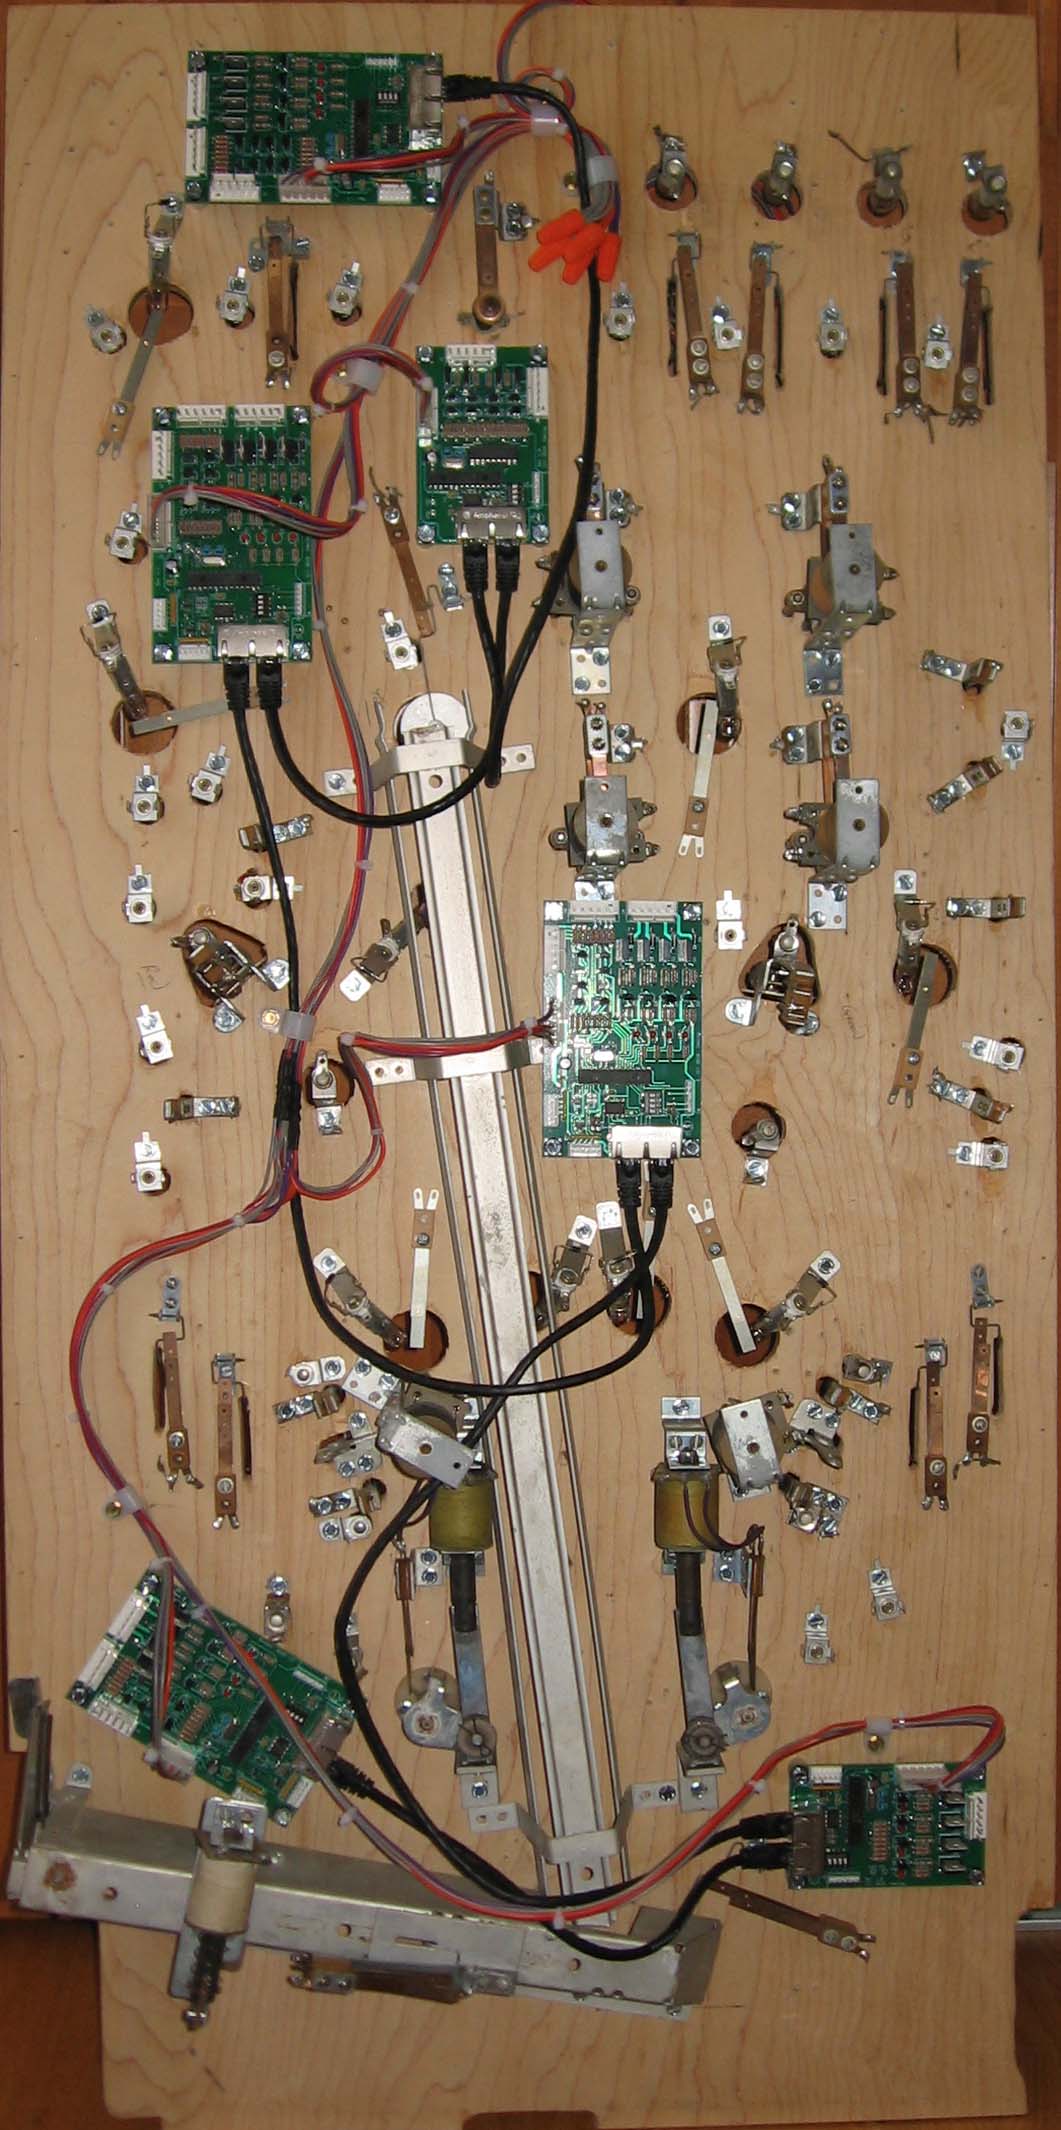
Step 5 - Wire the Power Supply
Power consists of three supply voltages, +5V, +12V (lamp), and +27V (coil) voltages along with two grounds. Power is bussed to all boards. It should enter the playfield toward the top of the playfield where it needs to be anchored securely.
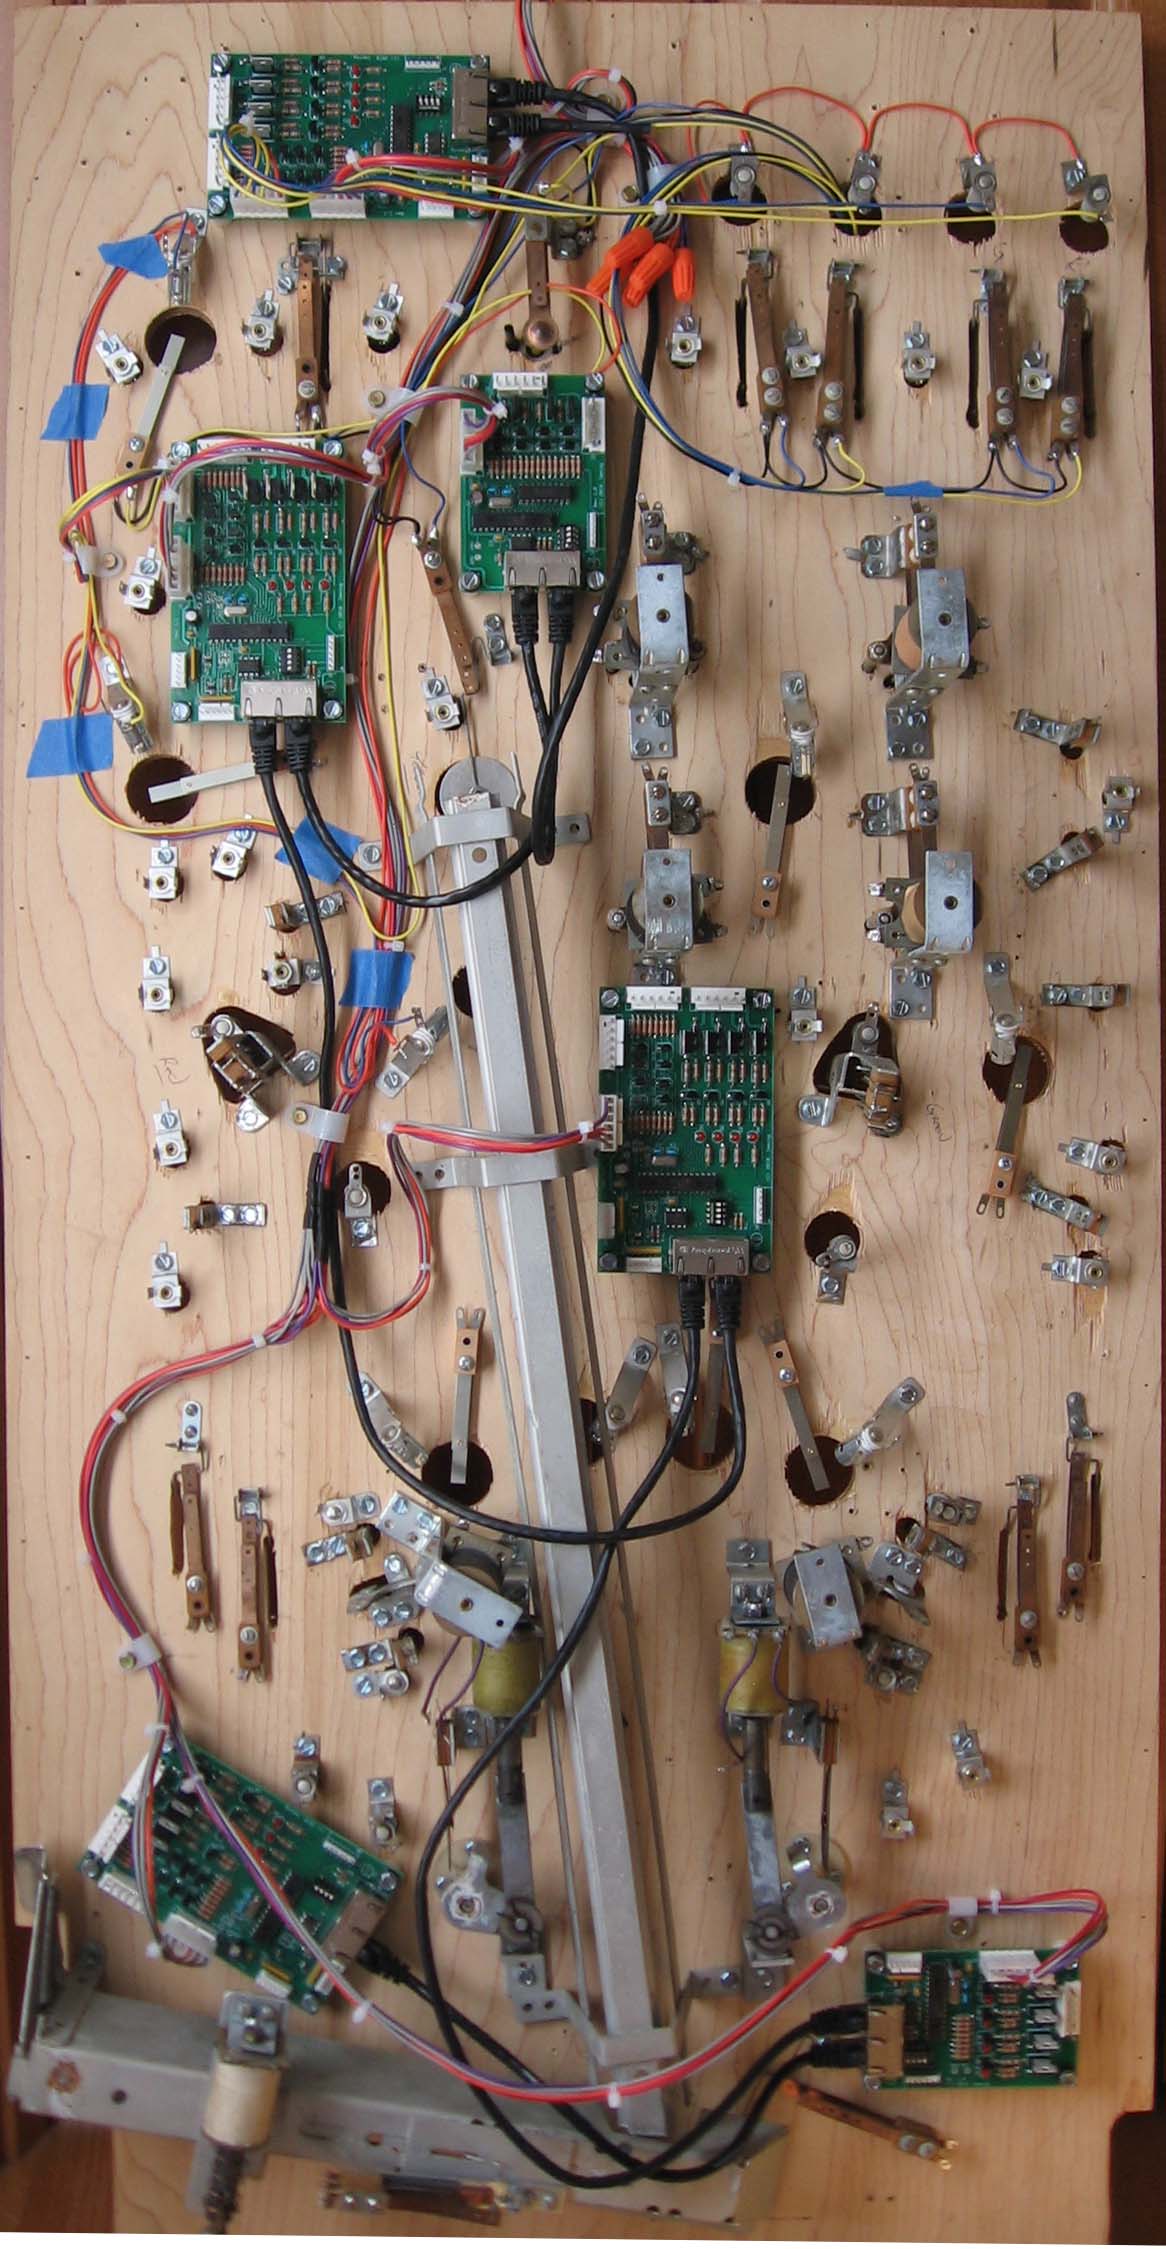
Step 6 - Wire the Connectors
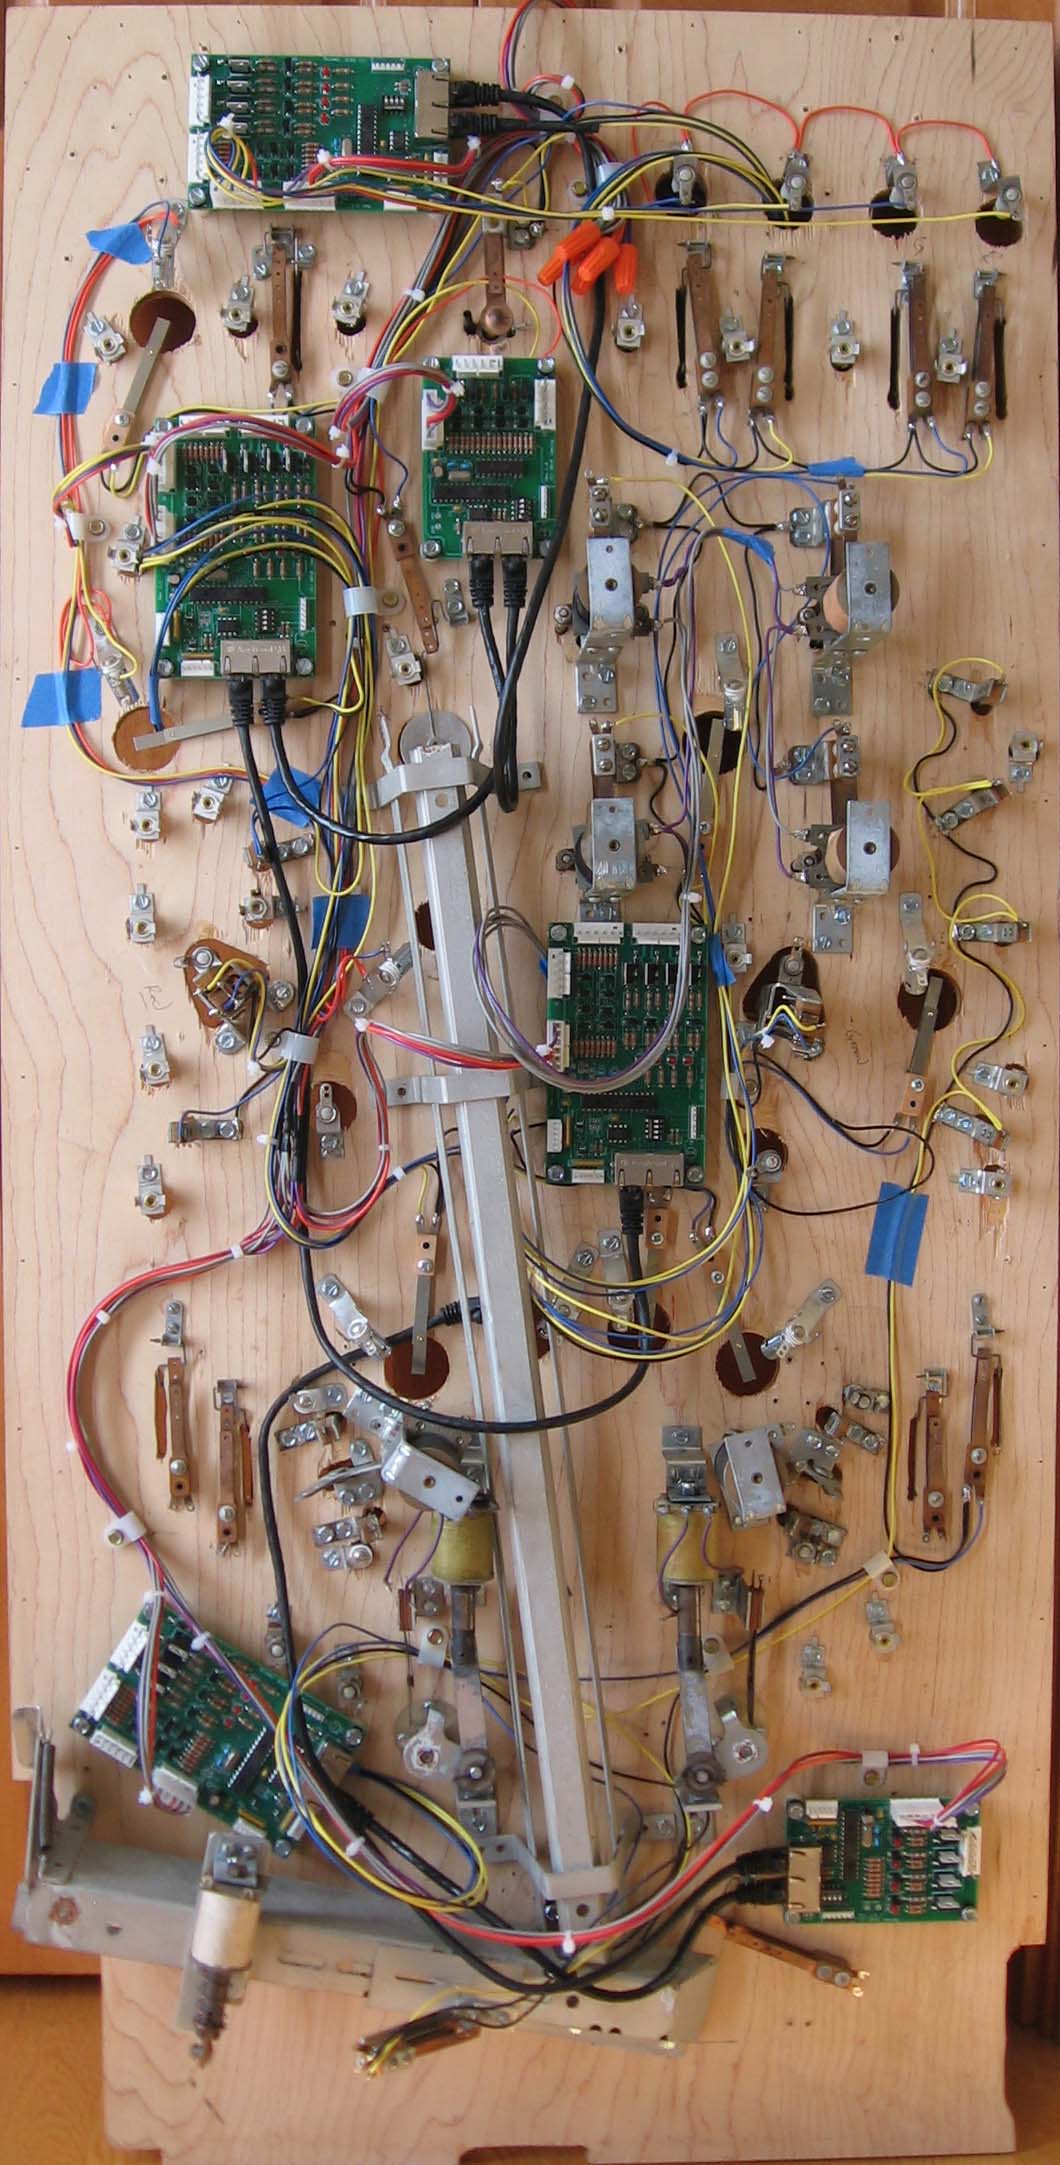
The final wired playfield
If you have any comments or questions, feel free to contact me.
Kerry Imming: kcimming@pobox.com
File: PinKit_playfield_wiring.html; Last modified: August 29, 2011